How to Add a Device Frame to a Video
A raw screen recording is a bare rectangle. Put the same clip inside a phone and people can tell at a glance that it is an app, and how it sits in the hand. This guide shows how to do that with Device Bezel, a free tool that runs in your browser, in about two minutes.
Short answer
- Open devicebezel.com and drop your screen recording on the page.
- Pick a device and its color.
- Set the background and aspect ratio.
- Click Export MP4.
No account, no watermark, and the video is never uploaded. The full steps, with screenshots, are below.
Watch the one minute walkthrough
What you need
- A screen recording. MP4 and MOV files from an iPhone, an Android phone or a simulator all work.
- A current browser. Chrome, Edge or Safari on a computer. Export relies on WebCodecs, which those three support.
If you do not have a recording yet, here is the quickest way to make one:
- iPhone: open Control Center, tap the Screen Recording button, and tap it again to stop. The clip lands in Photos.
- Android: swipe down twice for Quick Settings and tap Screen record.
- iOS Simulator on a Mac: run this in Terminal, then press Control+C to stop.
xcrun simctl io booted recordVideo app-demo.mp4Record at the phone's own resolution and do not crop it. A recording that matches the screen's shape fills the frame with nothing cut off.
Step 1Add your screen recording
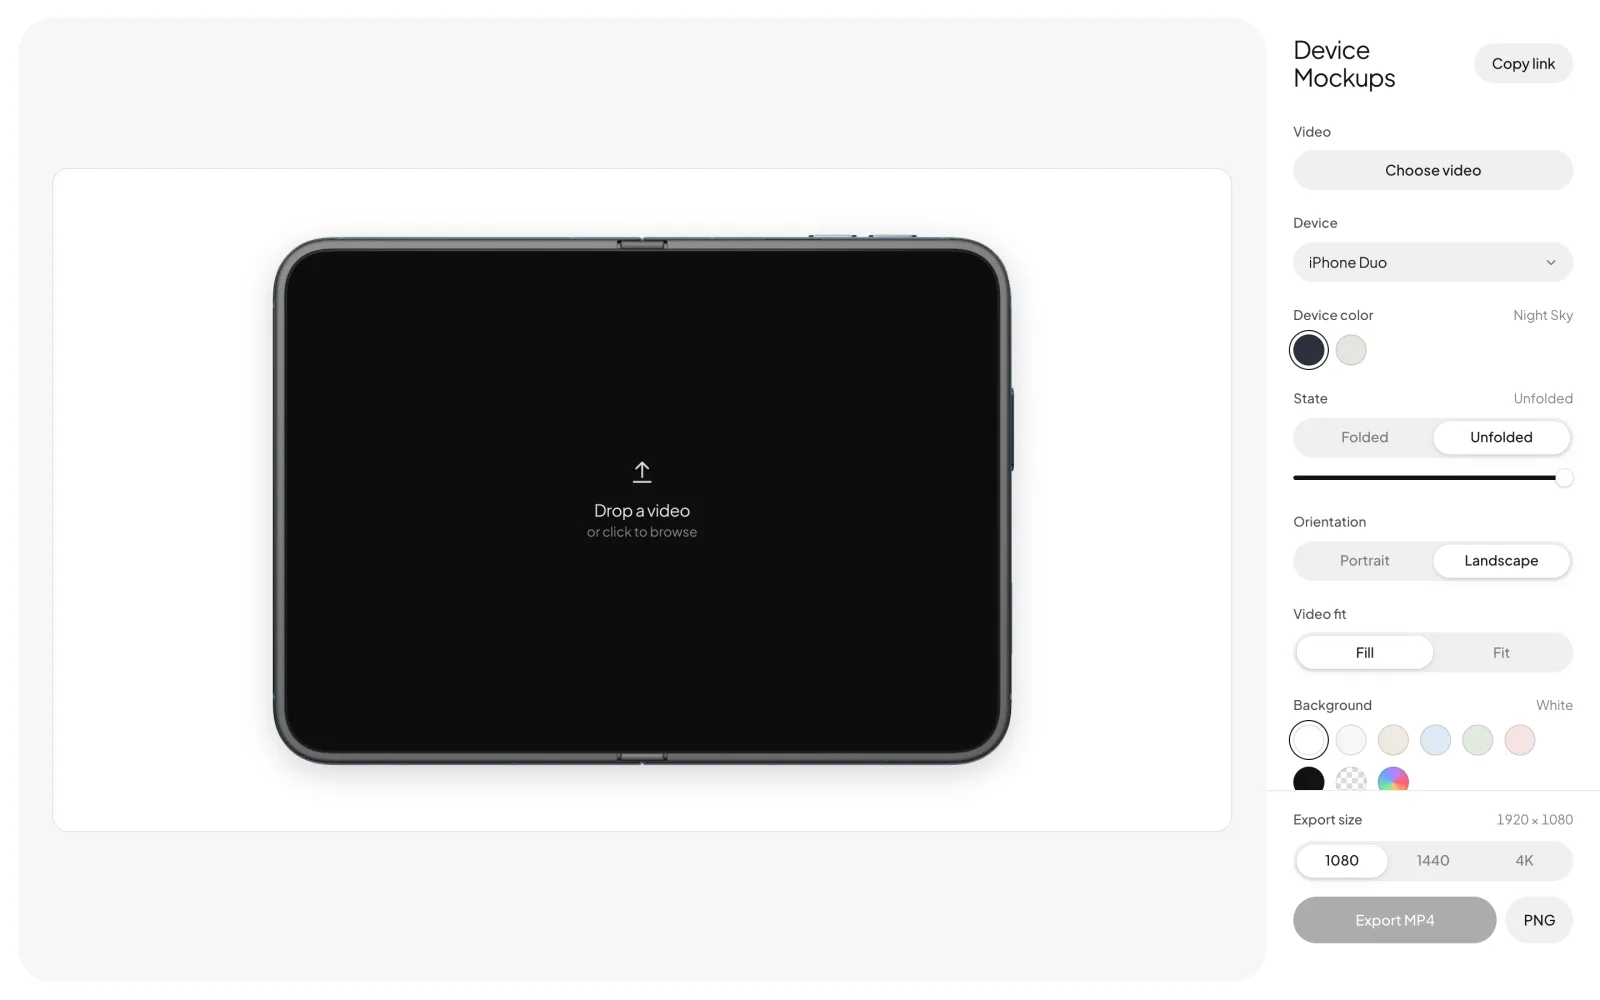
Go to devicebezel.com. You will see an empty phone on the left and the settings on the right. Drop your video anywhere on the page, or click Choose video and select the file.
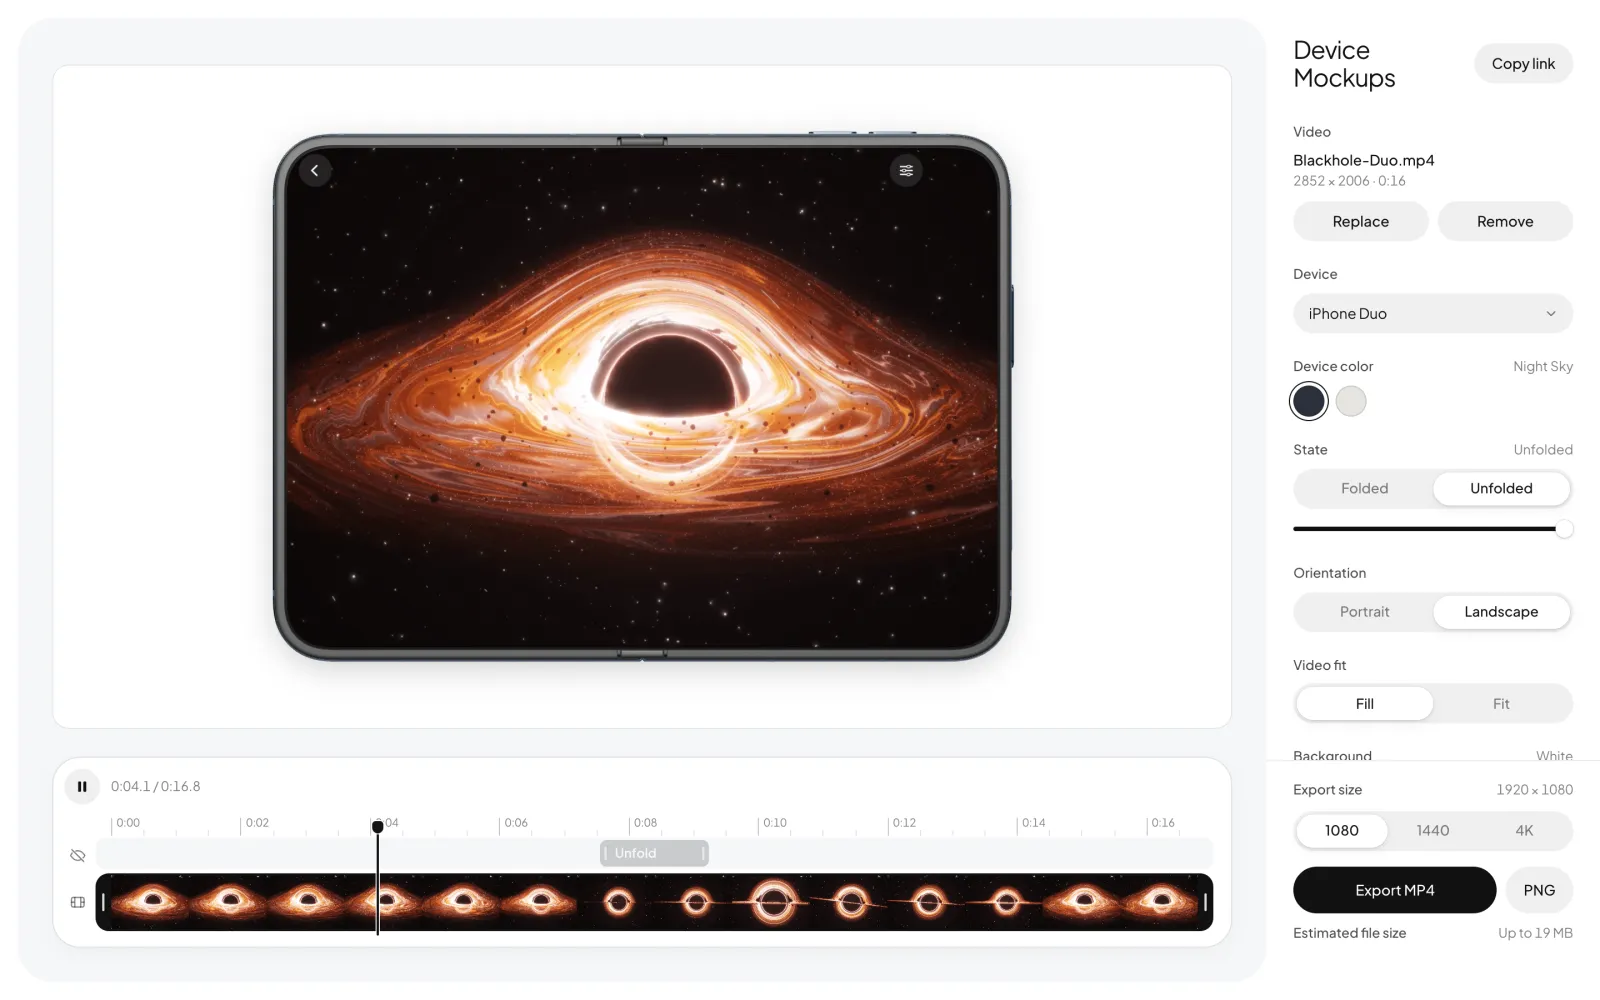
The clip starts playing inside the device straight away, and a timeline opens under the preview. The file name, resolution and length appear at the top of the settings panel so you can confirm it is the right file.
Step 2Pick a device and its color
Open the Device menu and choose the phone you want. At the time of writing the list is:
- iPhone 18 Pro and iPhone 18 Pro Max
- iPhone Air
- iPhone 17
- iPhone Duo, the folding one, which can be shown folded, unfolded or anywhere in between
Choose the model your recording came from when you can. The screen shapes differ between models, and a matching pair means no cropping. Our recording came from the open iPhone Duo, which is the device selected when you first visit, so it fits edge to edge. If the shapes do not match, Video fit decides what happens: Fill covers the whole screen and trims the overflow, Fit shows the whole recording with bars.
Then click a swatch under Device color. Each phone comes in its own finishes, and the name of the selected one appears beside the label. We chose Star White.
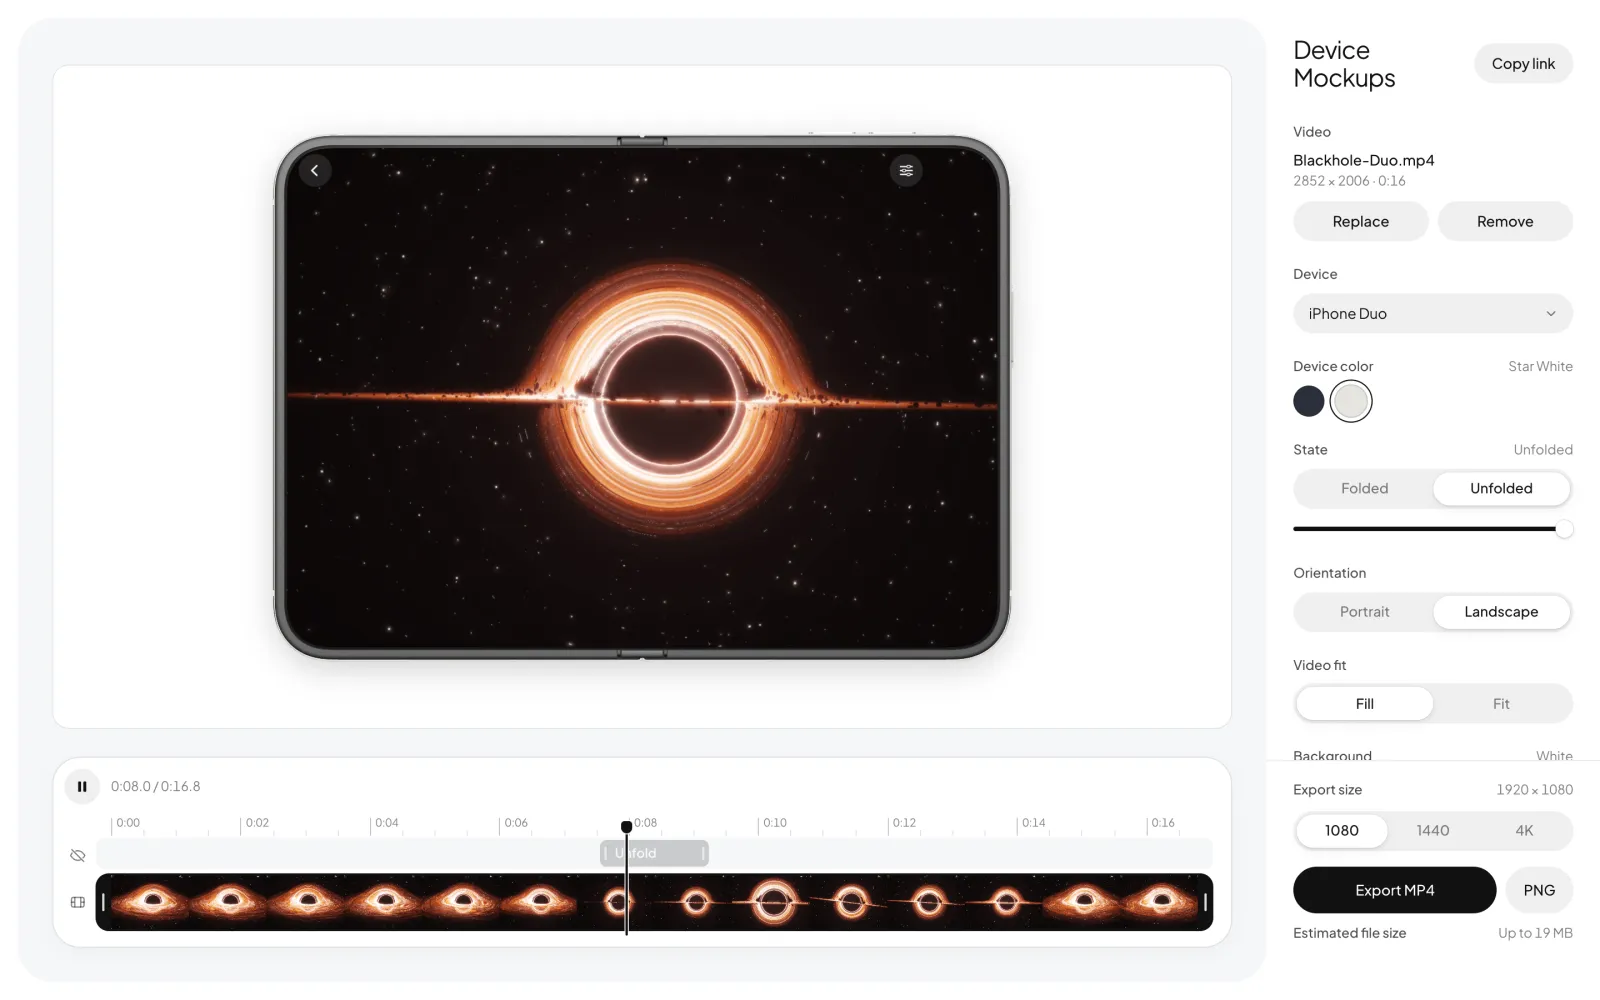
A simple rule for picking: a light frame for a dark app, a dark frame for a light app. The contrast keeps the edge of the screen readable at small sizes.
Two more switches sit just below. Orientation turns the device to portrait or landscape. On the one-piece iPhones, Dynamic Island hides the cutout, which helps when your recording already includes it.
Step 3Set the background and aspect ratio
Scroll the settings panel down to Background. There are seven presets, a transparent option, and a custom color picker at the end of the row. Then choose an Aspect ratio for the place the video is going:
| Ratio | Use it for |
|---|---|
| 9:16 | Instagram Reels, TikTok, YouTube Shorts, Stories |
| 16:9 | YouTube, landing pages, slide decks |
| 1:1 | Feed posts on Instagram, LinkedIn and X |
| 4:5 | Instagram and Facebook feed, where taller posts take more of the screen |
| Auto | A frame that hugs the device, for placing in your own layout |
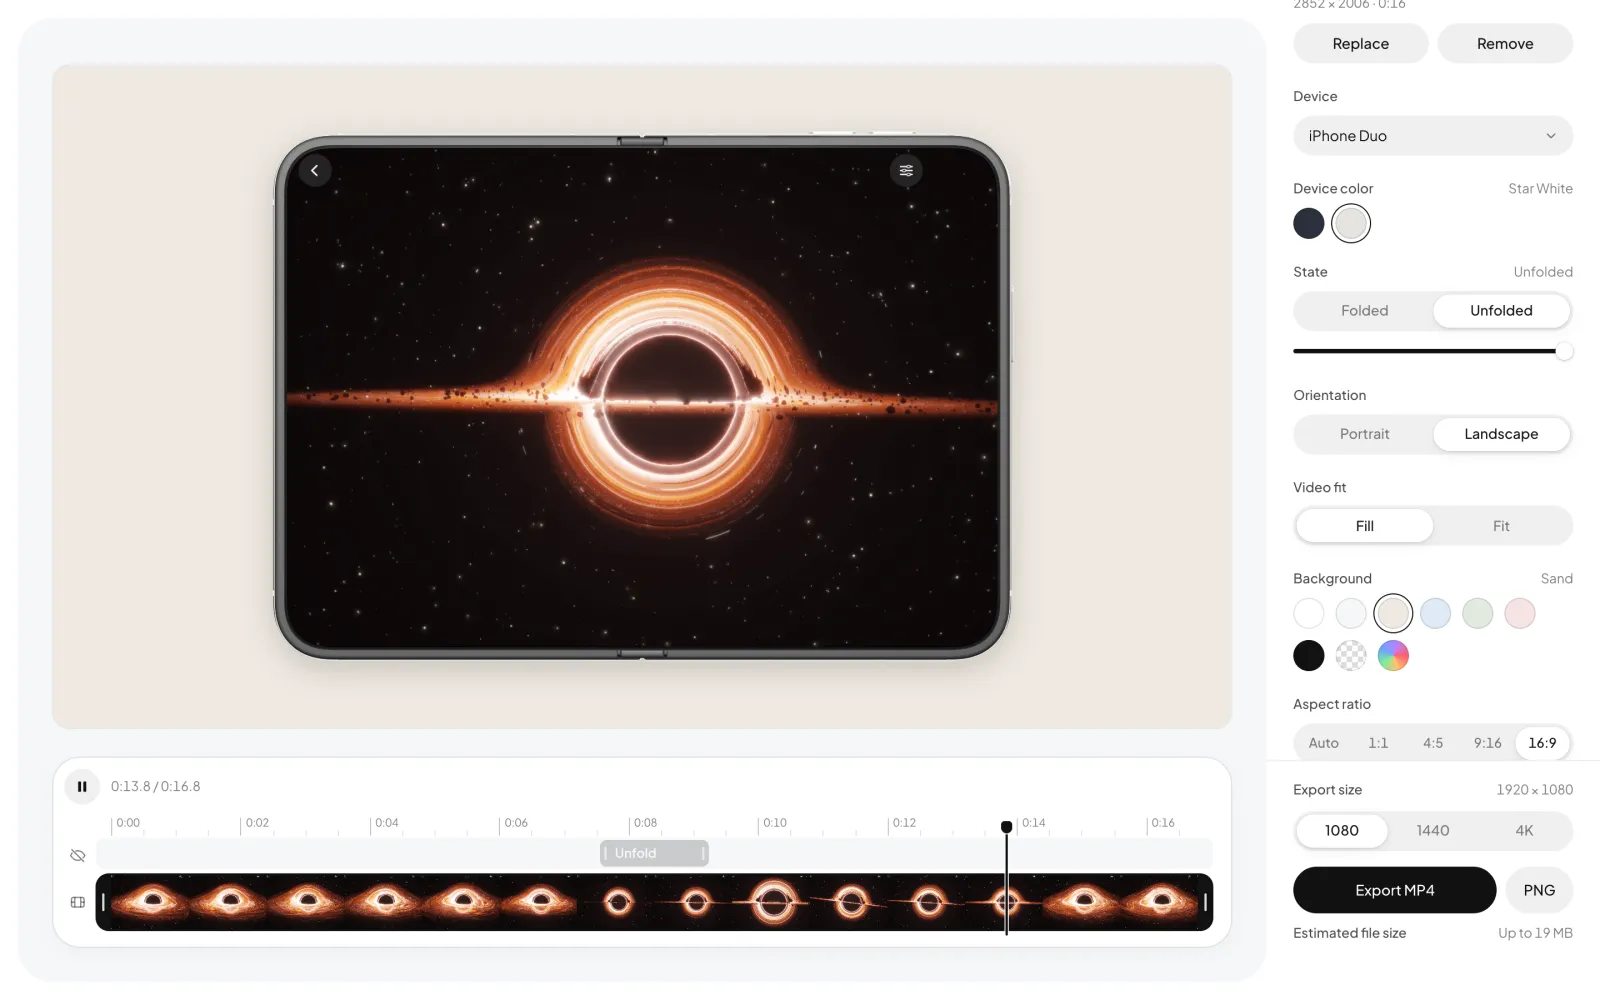
The preview changes as you click, so try a few. A phone held upright usually looks best at 9:16 or 4:5, and a landscape or unfolded device at 16:9.
Step 4Adjust padding and shadow
Padding sets how much room there is around the phone, from 0 to 30 percent. Less padding makes the phone bigger. Shadow runs from 0 to 100 percent and controls the soft shadow under the device.
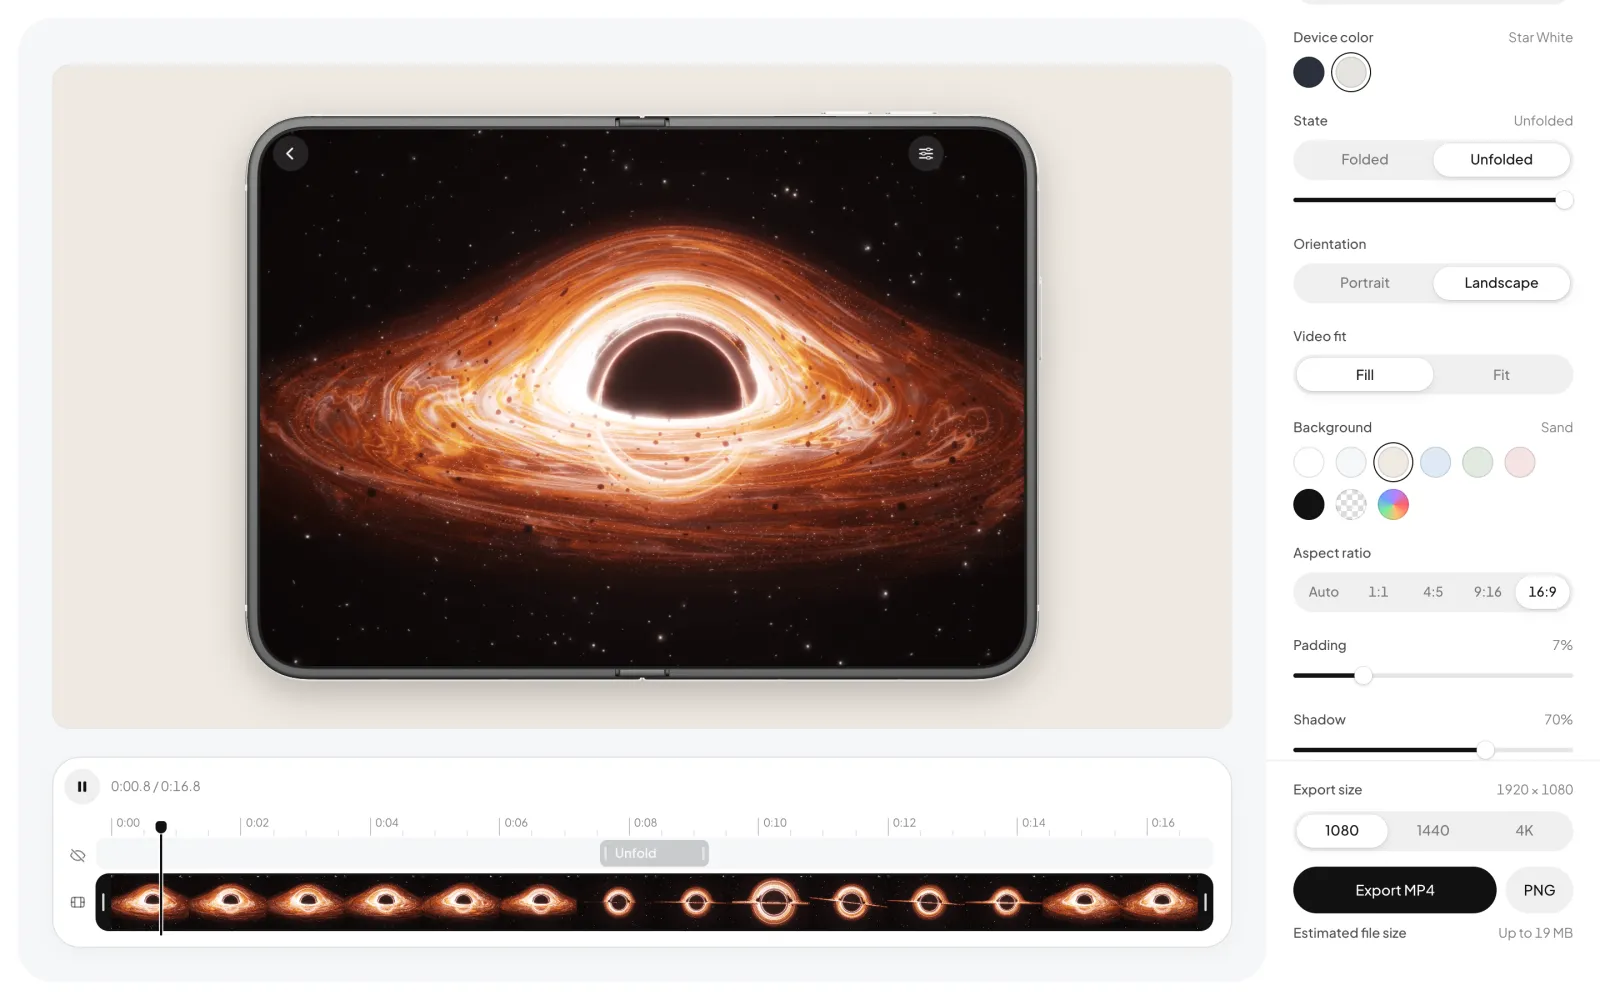
For vertical video, leave at least 12 percent. Apps like Instagram and TikTok lay their own buttons and captions over the top and bottom of the frame, and a phone that runs edge to edge ends up underneath them.
Step 5Trim the start and end
Screen recordings nearly always begin and end with a moment of fumbling, and most run longer than a demo needs. On the timeline, drag the handle at either end inward to cut. The part you cut is dimmed, and playback loops over what is left so you can check the cut.

You can also do this from the keyboard. Press Tab to reach a handle, then the Left and Right arrow keys move it by a tenth of a second, or by a full second with Shift held. Space plays and pauses.
Step 6Switch on the unfold animation
This step is for iPhone Duo. With any other phone, go straight to step 7.
When iPhone Duo is selected, the timeline has an extra Unfold track above the video. Click the eye icon beside it to switch it on. The video now starts with the phone folded, opens during the purple clip, and stays open to the end.
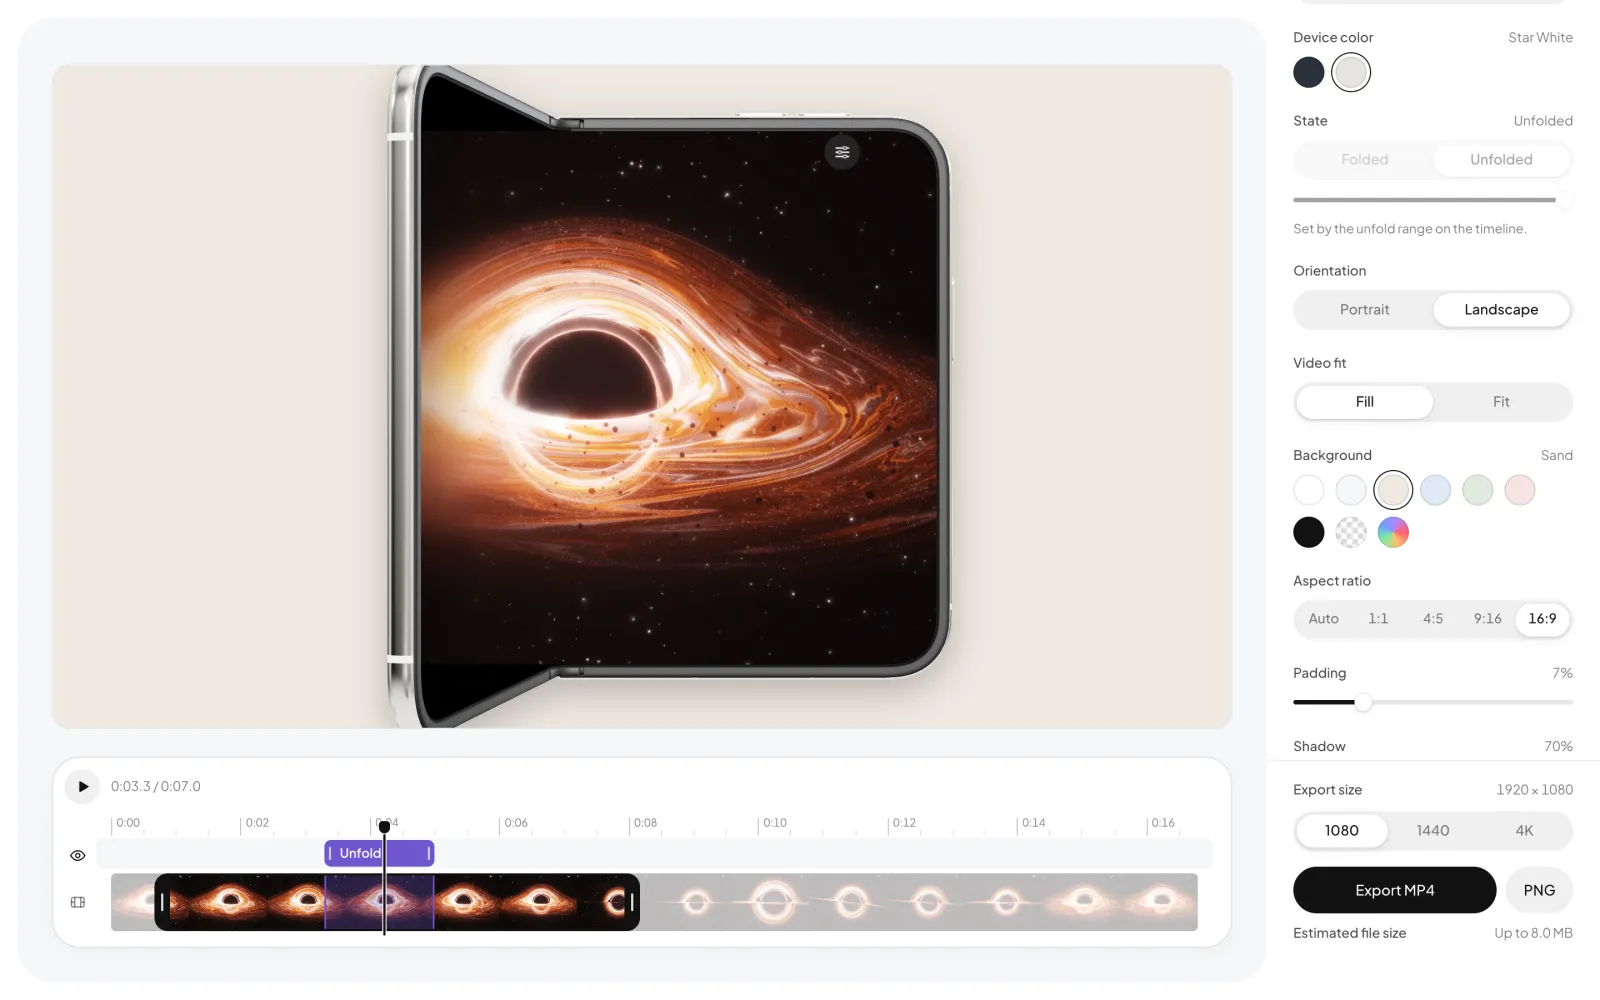
- Drag the clip left or right to choose when the phone opens.
- Drag either end of the clip to make the unfold faster or slower. It starts at 1.7 seconds.
- Scrub the playhead across the clip to check it frame by frame.
While the track is on, the State buttons are greyed out, because the timeline is now in charge of the fold.
Step 7Export the MP4
At the bottom of the panel, choose an Export size: 1080, 1440 or 4K. The number is the short side of the video, so 1080 at 16:9 gives 1920 × 1080. Then click Export MP4.
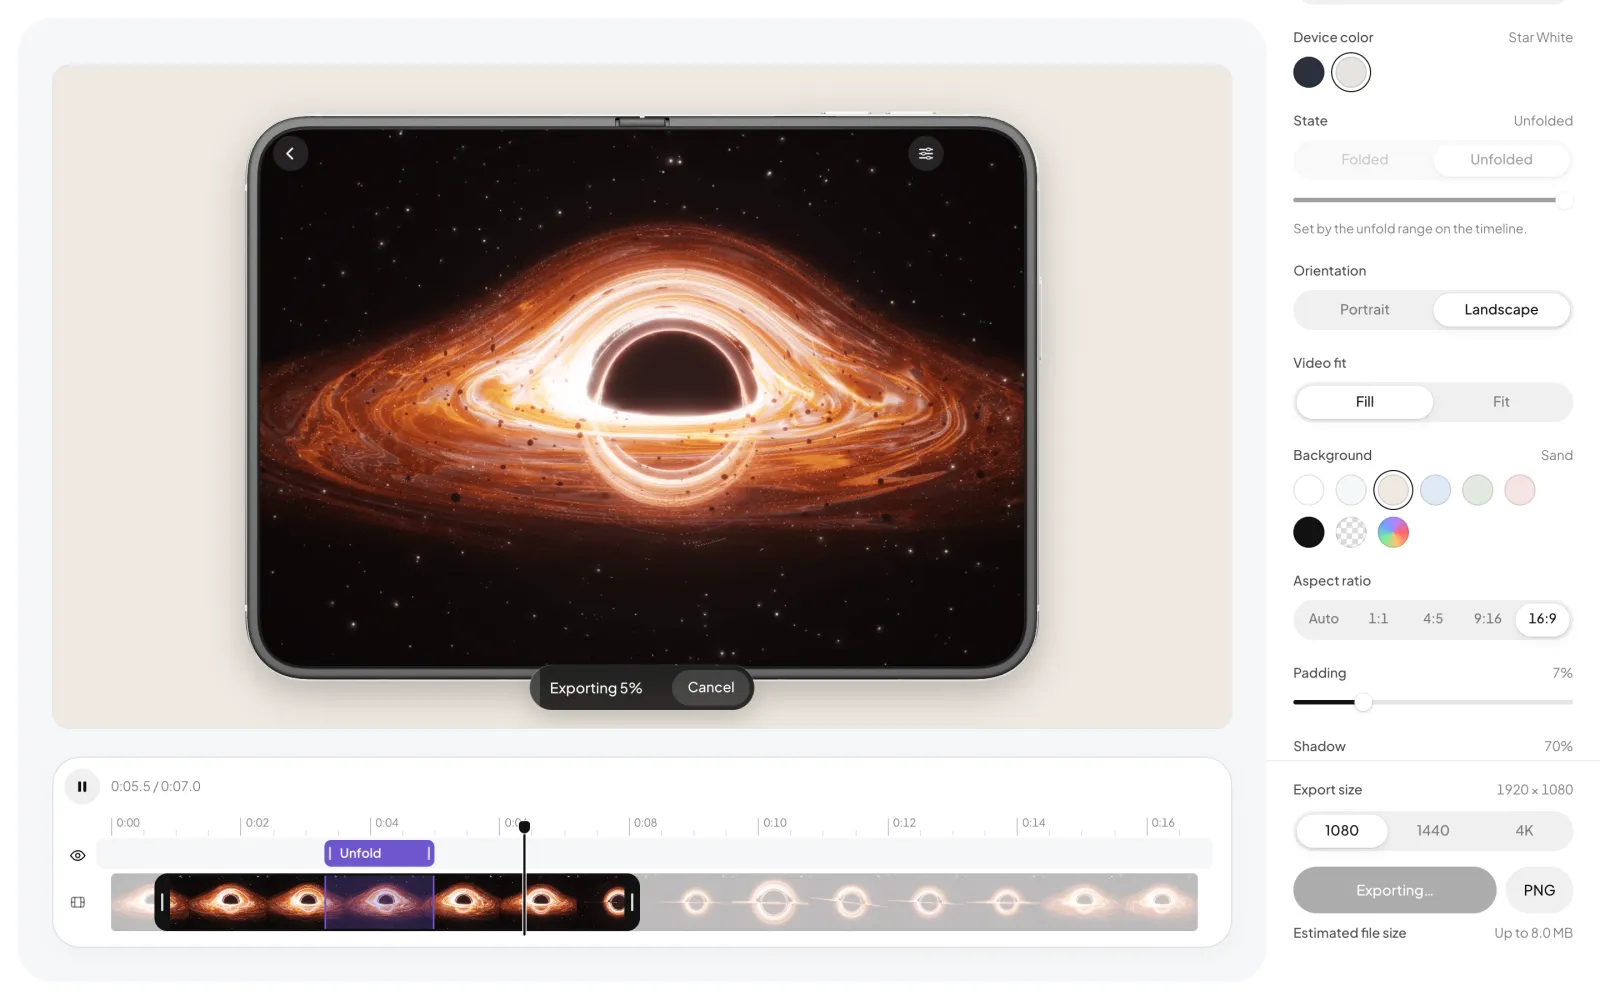
When it finishes, the file saves to your downloads folder with -mockup.mp4 added to the original name. The Estimated file size under the button is a guide. Flat interface footage usually
comes out smaller, and busy, detailed footage like our black hole can come out larger.
Need a still for a slide or a store listing? Pause on the frame you want and click PNG.
The result
Here is the recording we started with, and below it the file the tool exported.

Three things worth knowing
The same steps work for an upright phone
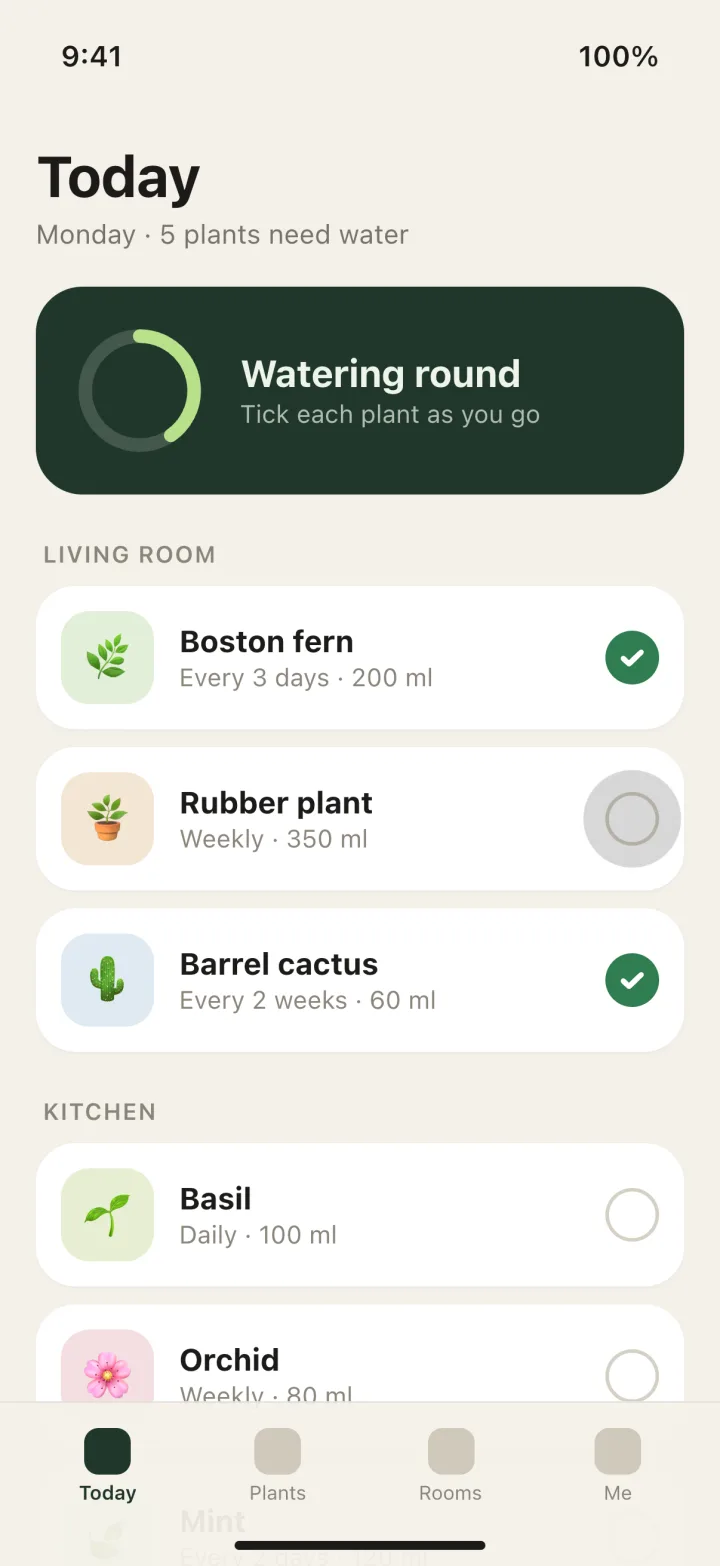
Nothing changes for a regular iPhone except the device you pick and the ratio. This is a vertical recording of a plant care app in an iPhone 18 Pro, in Glacier, on the Sky background at 9:16, ready for Reels or Shorts.
Save a look and reuse it
The page address always holds your current settings. Click Copy link and you get a link that reopens the tool with the same device, color, background, ratio, padding and shadow. This is the look used in this guide:
devicebezel.com/?color=star-white&bg=efe9e1&padding=7&shadow=70&unfold=1
The link carries settings only. Your video is not part of it, so it is safe to share with a teammate who then adds their own clip.
Keep editing while it exports
An export uses the settings from the moment you clicked the button. The preview stays live, so you can set up the next variation, say the same clip at 1:1, while the first one finishes.
If something goes wrong
- "can't be played in this browser". The file uses a codec your browser cannot decode. Convert it to MP4 with H.264 and add it again.
- Export shows an error instead of starting. Your browser lacks WebCodecs. Switch to a current version of Chrome, Edge or Safari.
- The background came out white, not transparent. MP4 cannot store transparency. Pick a solid background for video, or export a PNG if you need a transparent still.
- The sides of the recording are cut off. The recording and the device have different shapes. Switch Video fit to Fit, or choose the device the recording came from.
Questions people ask
Is Device Bezel free?
Yes. There is no account, no paid plan and no watermark on the exported video.
Is my video uploaded anywhere?
No. The video is decoded, framed and encoded inside your browser. The site has no server that receives files, which also means an unreleased app stays private.
Which devices can I use as a frame?
iPhone 18 Pro, iPhone 18 Pro Max, iPhone Air, iPhone 17 and the folding iPhone Duo, each in its own colors.
Does the export keep the audio?
Yes, when your browser can process the audio track in the source file. A silent recording stays silent.
Can I export with a transparent background?
For still images, yes: PNG exports keep the transparency. MP4 has no alpha channel, so a video exported with a transparent background gets a white one.
Which browsers work?
Current versions of Chrome, Edge and Safari. Video export uses WebCodecs, and a browser without it shows an error instead of exporting.
Can I add a device frame to a screenshot instead of a video?
The tool takes video files. To get a still, load a video, pause on the frame you want and click PNG.
Frame your own recording
It takes about two minutes and nothing leaves your computer.
Open devicebezel.com